
Whether scheduling meetings, events, tasks, or even keeping tabs on the weather, a good digital calendar can help you stay on top of your game in ways that a normal calendar could never do. Indeed, there are many calendars to choose from, but Google Calendar is one of the best due to Google's excellent cloud service, feature-rich web-client, and their easy-to-use Android and iOS applications.
But as useful as Google Calendar can be, there are a lot of additional features you may not be aware of. Today, we're going to take a look at 15 tips to get the most out of Google Calendar so that you never miss a beat.
Note: Some of these tips are specific to the web client of Google Calendar, whereas others are geared towards both web and mobile.
#1: Share Your Calendar (Web Client)
Sharing your calendar is one of the best ways to stay connected with your family, friends, and even your coworkers. By sharing your calendar, you enable others to see all of your important events and notes that you've created.
The ways that this can be useful are innumerable to say the least, as being able to see the schedule of another person allows for better communication between individuals or groups, and also raises productivity by keeping track of any tasks that need to be completed.
So, let's say you're leading a team on a project, school or otherwise, and you want to create a calendar of events and tasks for your group. All you need to do is create a new calendar for the group (covered in the next tip), share your calendar, and now everyone in the group can keep track of action plan you have created. This way everyone knows exactly what is going on at all times.
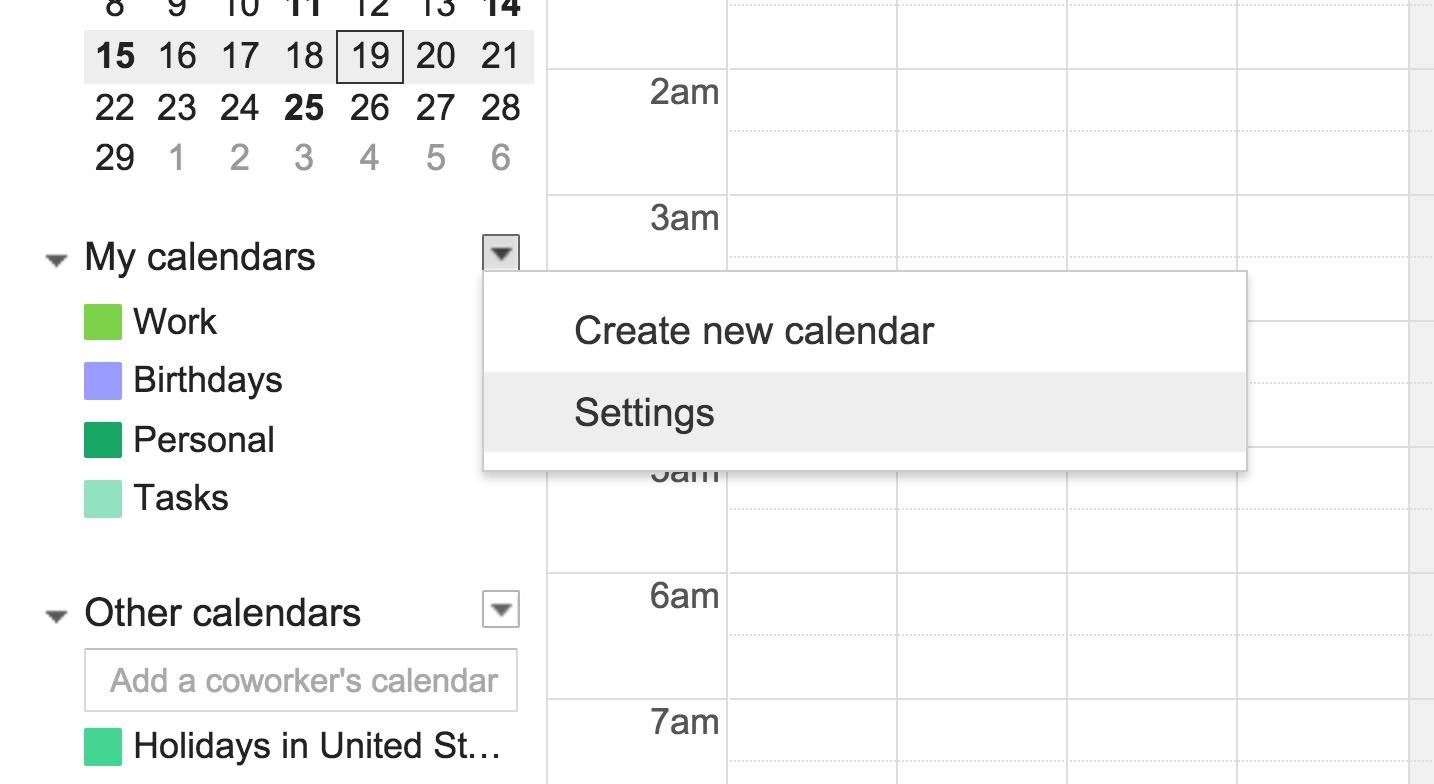
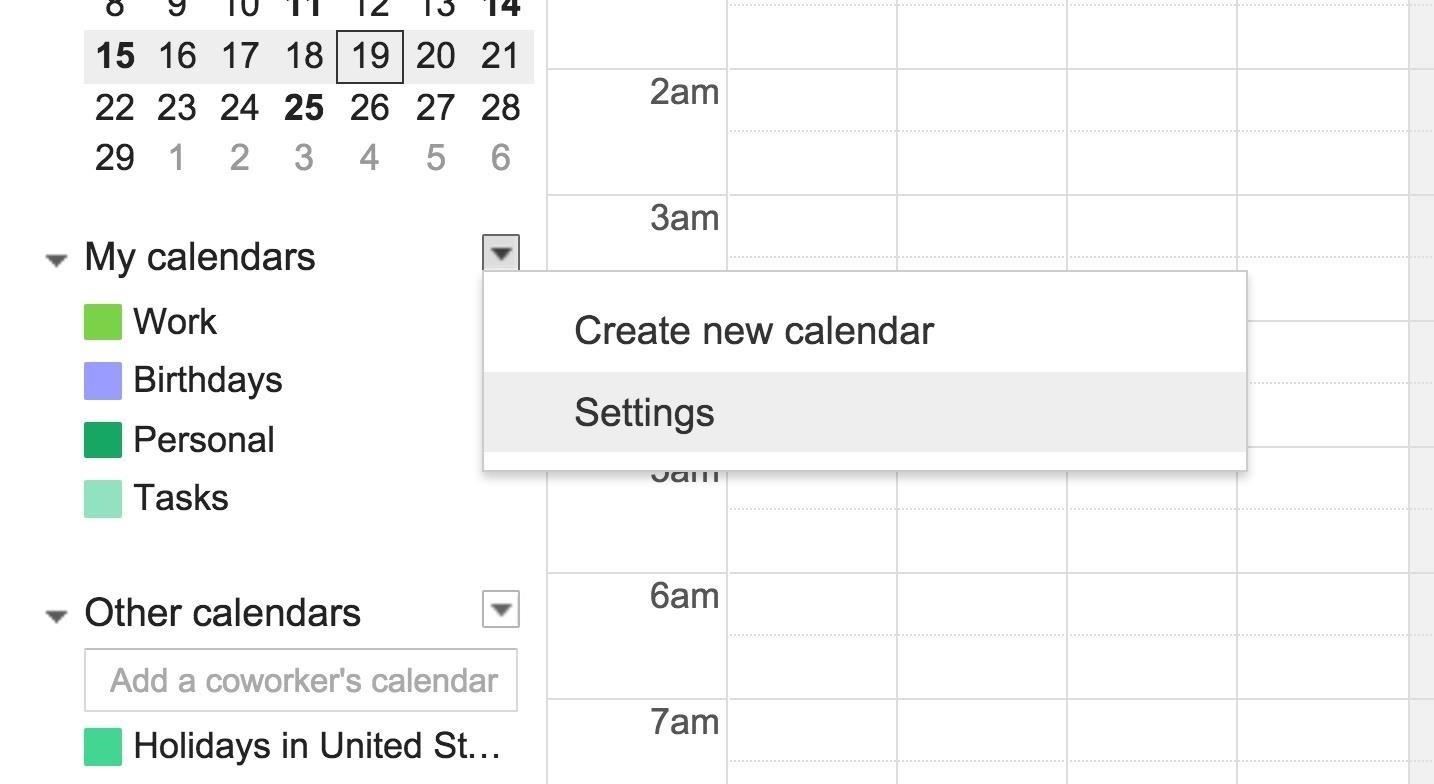
There are a few ways to share your calendar. First, if you want to share your calendar with a friend, colleague, or family member, navigate to the left side of the screen where My calendars is located. Select the drop-down menu with your mouse and go to "Settings." This will take you to your calendar settings.
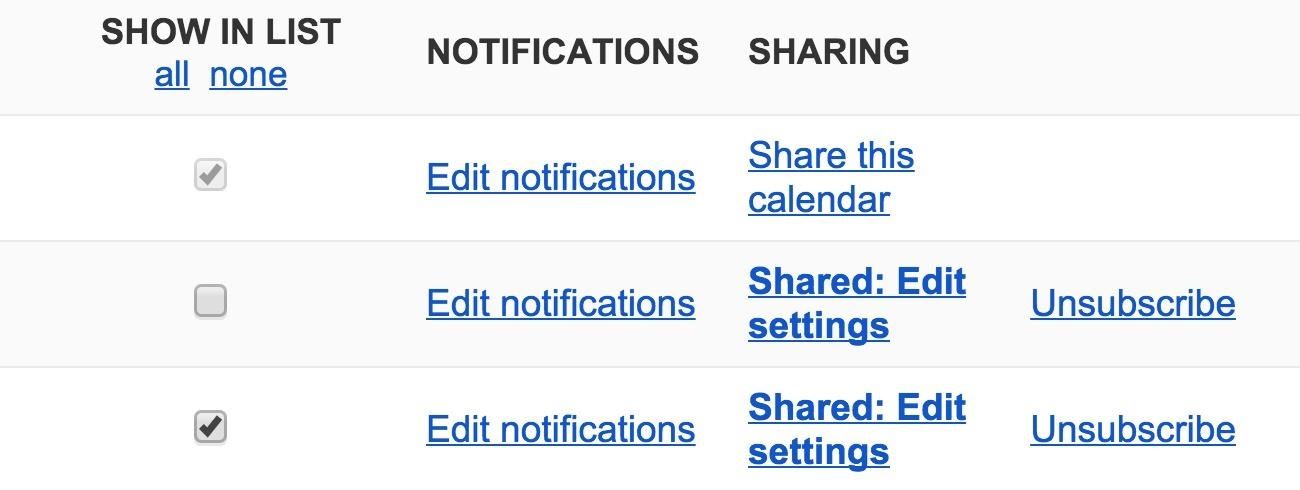
Next, find the calendar you wish to share and navigate over to the right side of the screen where it says "Share this calendar" (if you've already shared it with someone, it'll say "Shared: Edit settings" instead). Click on that and Google will then prompt you with a couple of options: make public or share with a specific person.
If you wish for your calendar to be searching on the web, check Make this calendar public. To share with a specific person, enter their email address into the text box below Person. Once completed, an email notification will be sent to out to the invited person, notifying them of the request.
#2: Create Multiple Calendars (Web Client)
The wonderful thing about people is that they are multifaceted. A man walking through Times Square in a high-priced suit might also play lead guitar in an '80s rock 'n' roll cover band.
No matter the dynamic of the individual, Google Calendar can help organize every aspect of your life. By creating different calendars for the different parts of your life, you can get a more accurate visual picture of how your life is structured and where things can be tidied up.
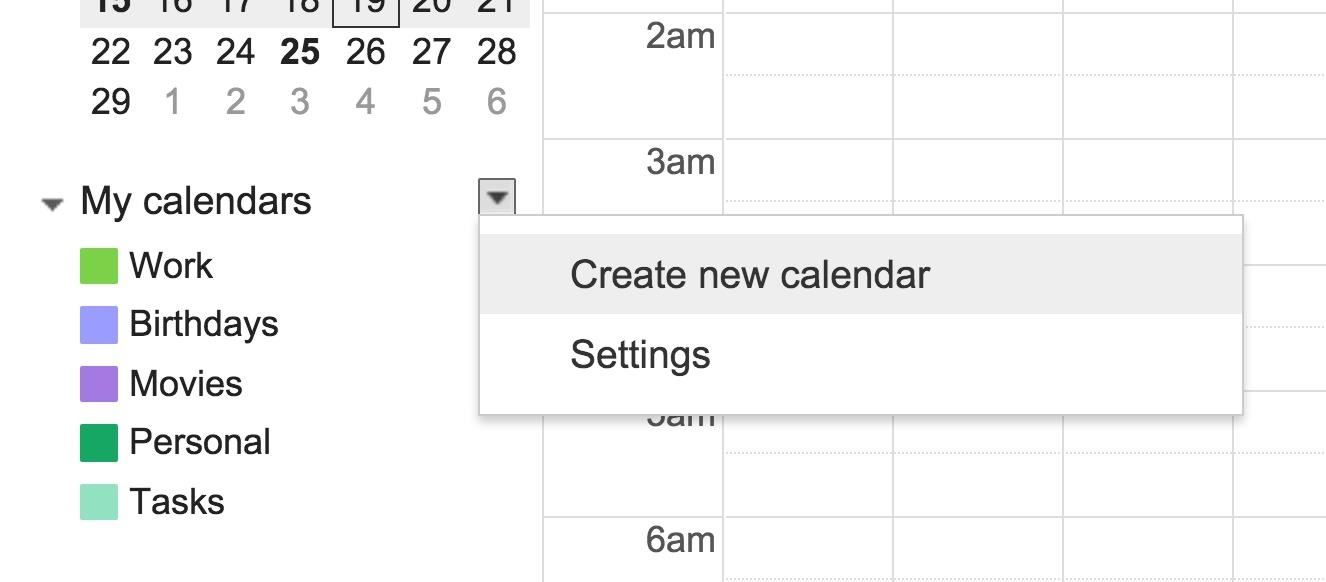
To create multiple calendars, navigate to My calendars, select the drop-down menu, then select "Create new calendar."
#3: Send Event Emails to Everyone Invited (Web Client & Mobile)
One of the benefits of sharing your calendar and events with others is the ability to send a quick message via email to everyone who has access. This is an incredibly useful feature for anyone who might be running late to a meeting or needs to reschedule the meeting altogether. This is far more efficient than creating a group text message where you have to input the names of the recipients one by one; instead, simply send an event message and everyone will receive it automatically.
To send event emails through the web client, find the event you wish to send a message for, select it, and then click "Edit event". (Pro tip: if you click on the title of the event, it'll take you directly to the Edit event page.)
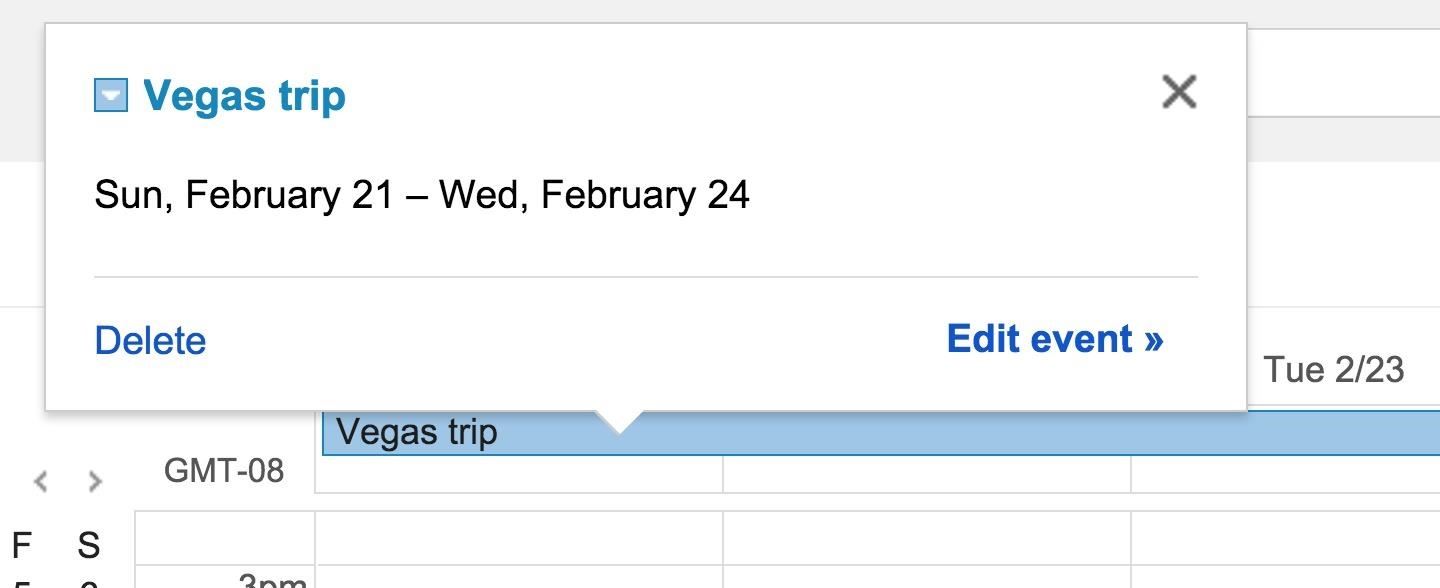
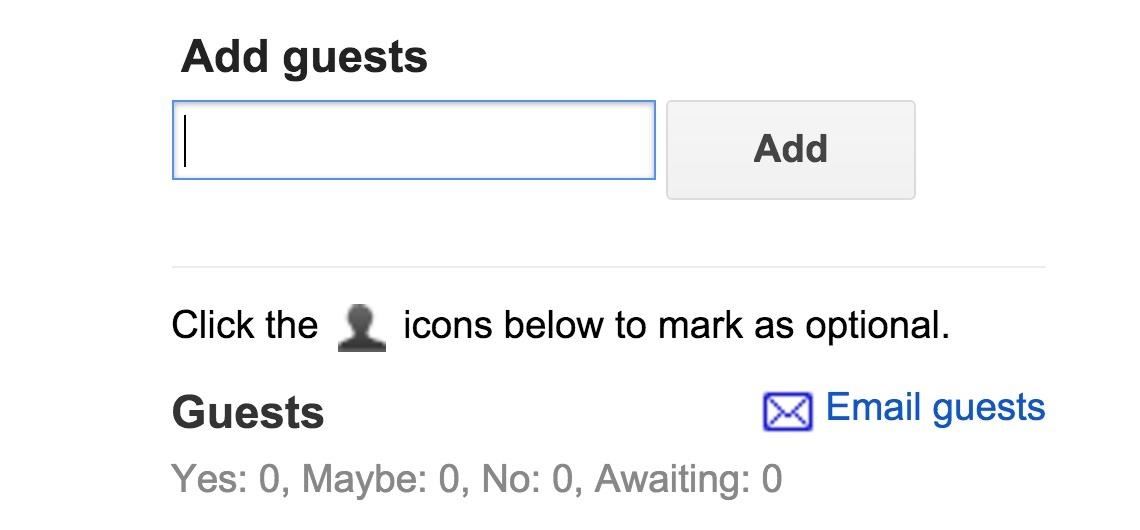
On the right side of the screen, add someone in the Add guests box. After you add all your guests, there will be a link that says "Email guests" below. Select it and Google Calendar will prompt you to enter your message.
On mobile, a notification will be pushed to your phone as your event nears. From this notification, you will be able to send a number of preset messages to the invited members or create a message of your own.
#4: Display Weather Forecast (Web Client)
Checking the weather on a regular basis is a good habit to have, especially if you live in an area that's susceptible to a lot of rain or snow. Fortunately, Google Calendar can also display the weather as well so that when you're checking your agenda or scheduling a new event, the weather will be right there for you to see.
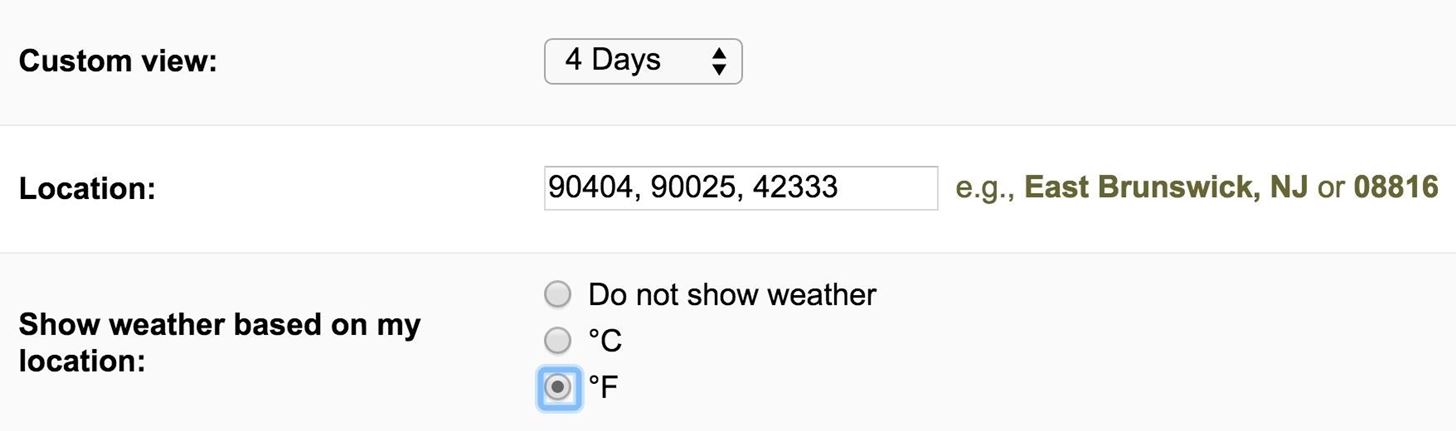
To enable weather details, navigate to the Preferences cog, select "Settings," then scroll down to where the Location option is. Here, you will need to enter the location(s) of the area where the weather is of concern to you. You can enter more than one location; just make sure to separate the different locations by a comma so that each location will be displayed on the calendar.
After you've entered your location, choose either Fahrenheit (ºF) or Celsius (ºC) to enable weather forecasts next to the Show weather based on my location option.
#5: Access Calendar Offline (Web Client & Mobile)
One of the great things about using a traditional paper calendar is that you can have it with you at all times, no internet connection required. Well, you can do the same with Google Calendar as well with it's offline functionality. Google allows you to sync your calendar to your device so that you can view and schedule your events without the need of an internet connection.
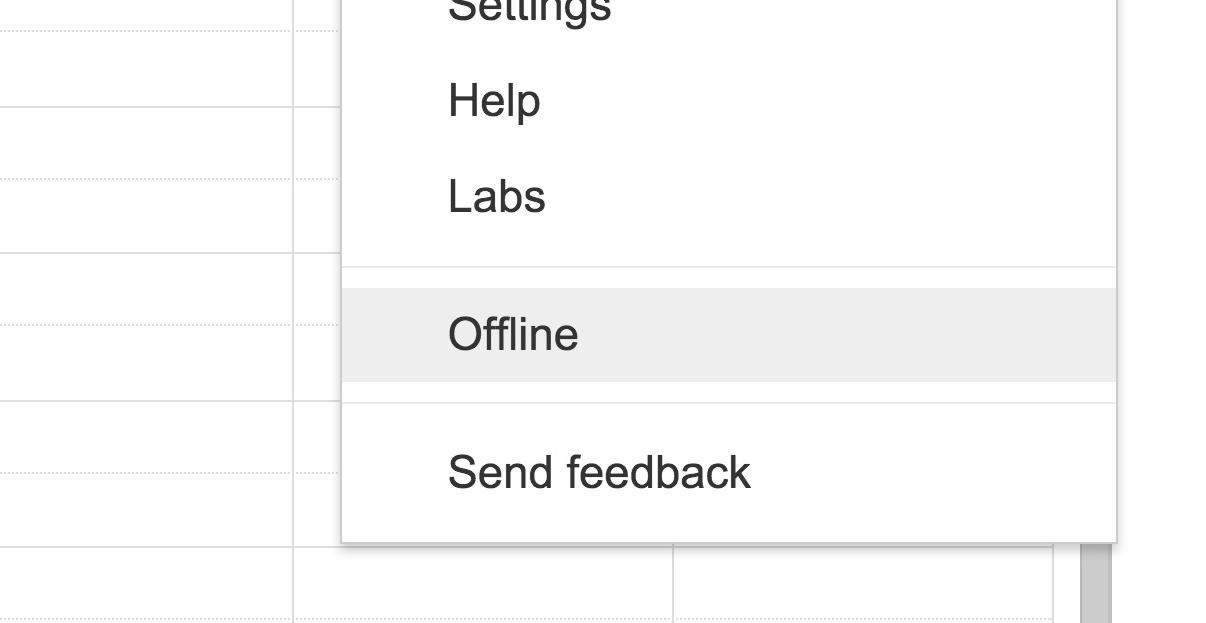
To access your Google Calendar offline, you must be using Google's Chrome web browser. Once inside your calendar, simply click the Preferences cog on the upper right and select "Offline."
On mobile, Google Calendar will sync automatically to your device.
#6: Google Calendar Keyboard Shortcuts (Web Client)
Keyboard shortcuts are truly a blessing: they allow for faster navigation through menus and actions, saving you an exorbitant amount of time. Thankfully, Google Calendar supports some nifty keyboard shortcuts for you to use in conjunction with the web client.
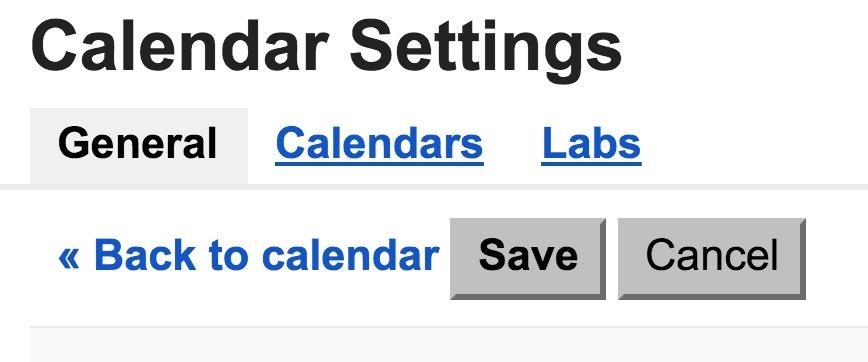
To use keyboard shortcuts in Google Calendar, you're going to need to activate them first. To turn on keyboard shortcuts, navigate to "Settings" again and scroll all the way down to the bottom of the page. Here, you will see the option to enable Google Calendar keyboard shortcuts. Select "Yes" to enable keyboard shortcuts, then click "Save."
Once keyboard shortcuts are enabled, you can use them to navigate through Google Calendar in various ways. Here are some keyboard shortcuts to help get you started.
Moving around the Calendar:
- Change your calendar view to the next date range = J or N
- Refresh your calendar = R
- Move to the current day = T
- Move to add a calendar section = +
- Put your cursor in the search box = /
- Go to the Settings page = S
Change your calendar view:
- Day view = 1 or D
- Week view = 2 or W
- Month view = 3 or M
- Custom view = 4 or X
- Agenda view = 5 or A
Note: More shortcuts can be found here.
#7: Change Google Calendar's Appearance (Web Client & Mobile)
Google Calendar features a number of ways to spruce up your calendar so that it's a bit more pleasant to look at. First, you can change the color of the events you've created on your calendar to help distinguish it from the events created by anyone you might be sharing calendars with.
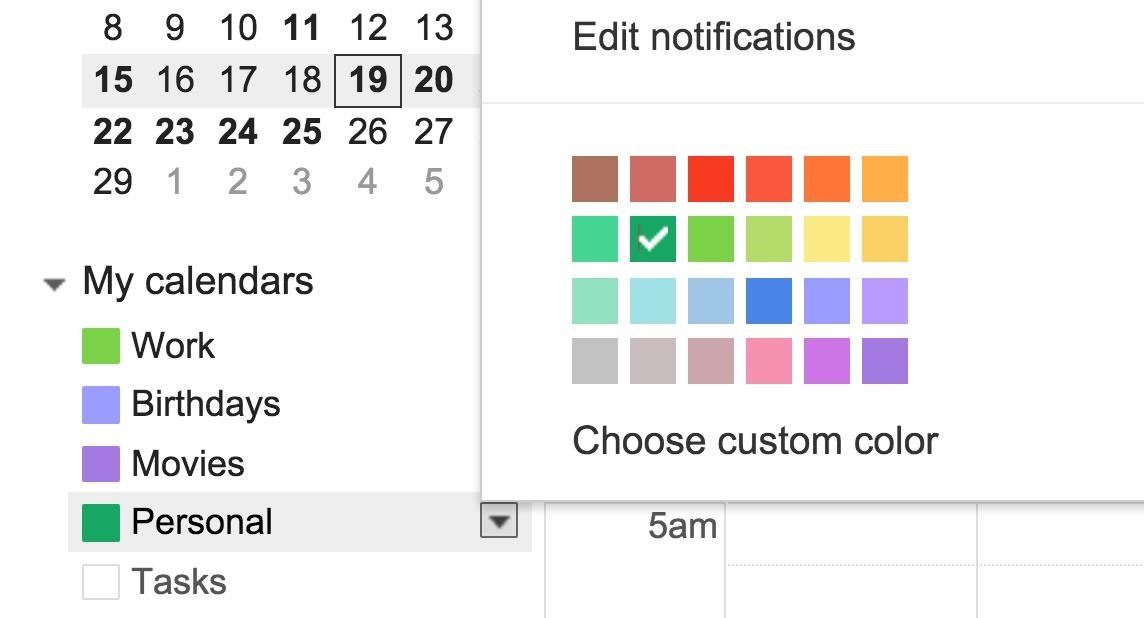
To do this on the web client, navigate to the My calendars section and identify the calendar you wish to change the color of. Then, select the drop-down menu of the calendar you want to change and you will have the option to select from a number of preset colors and the option to create your own.
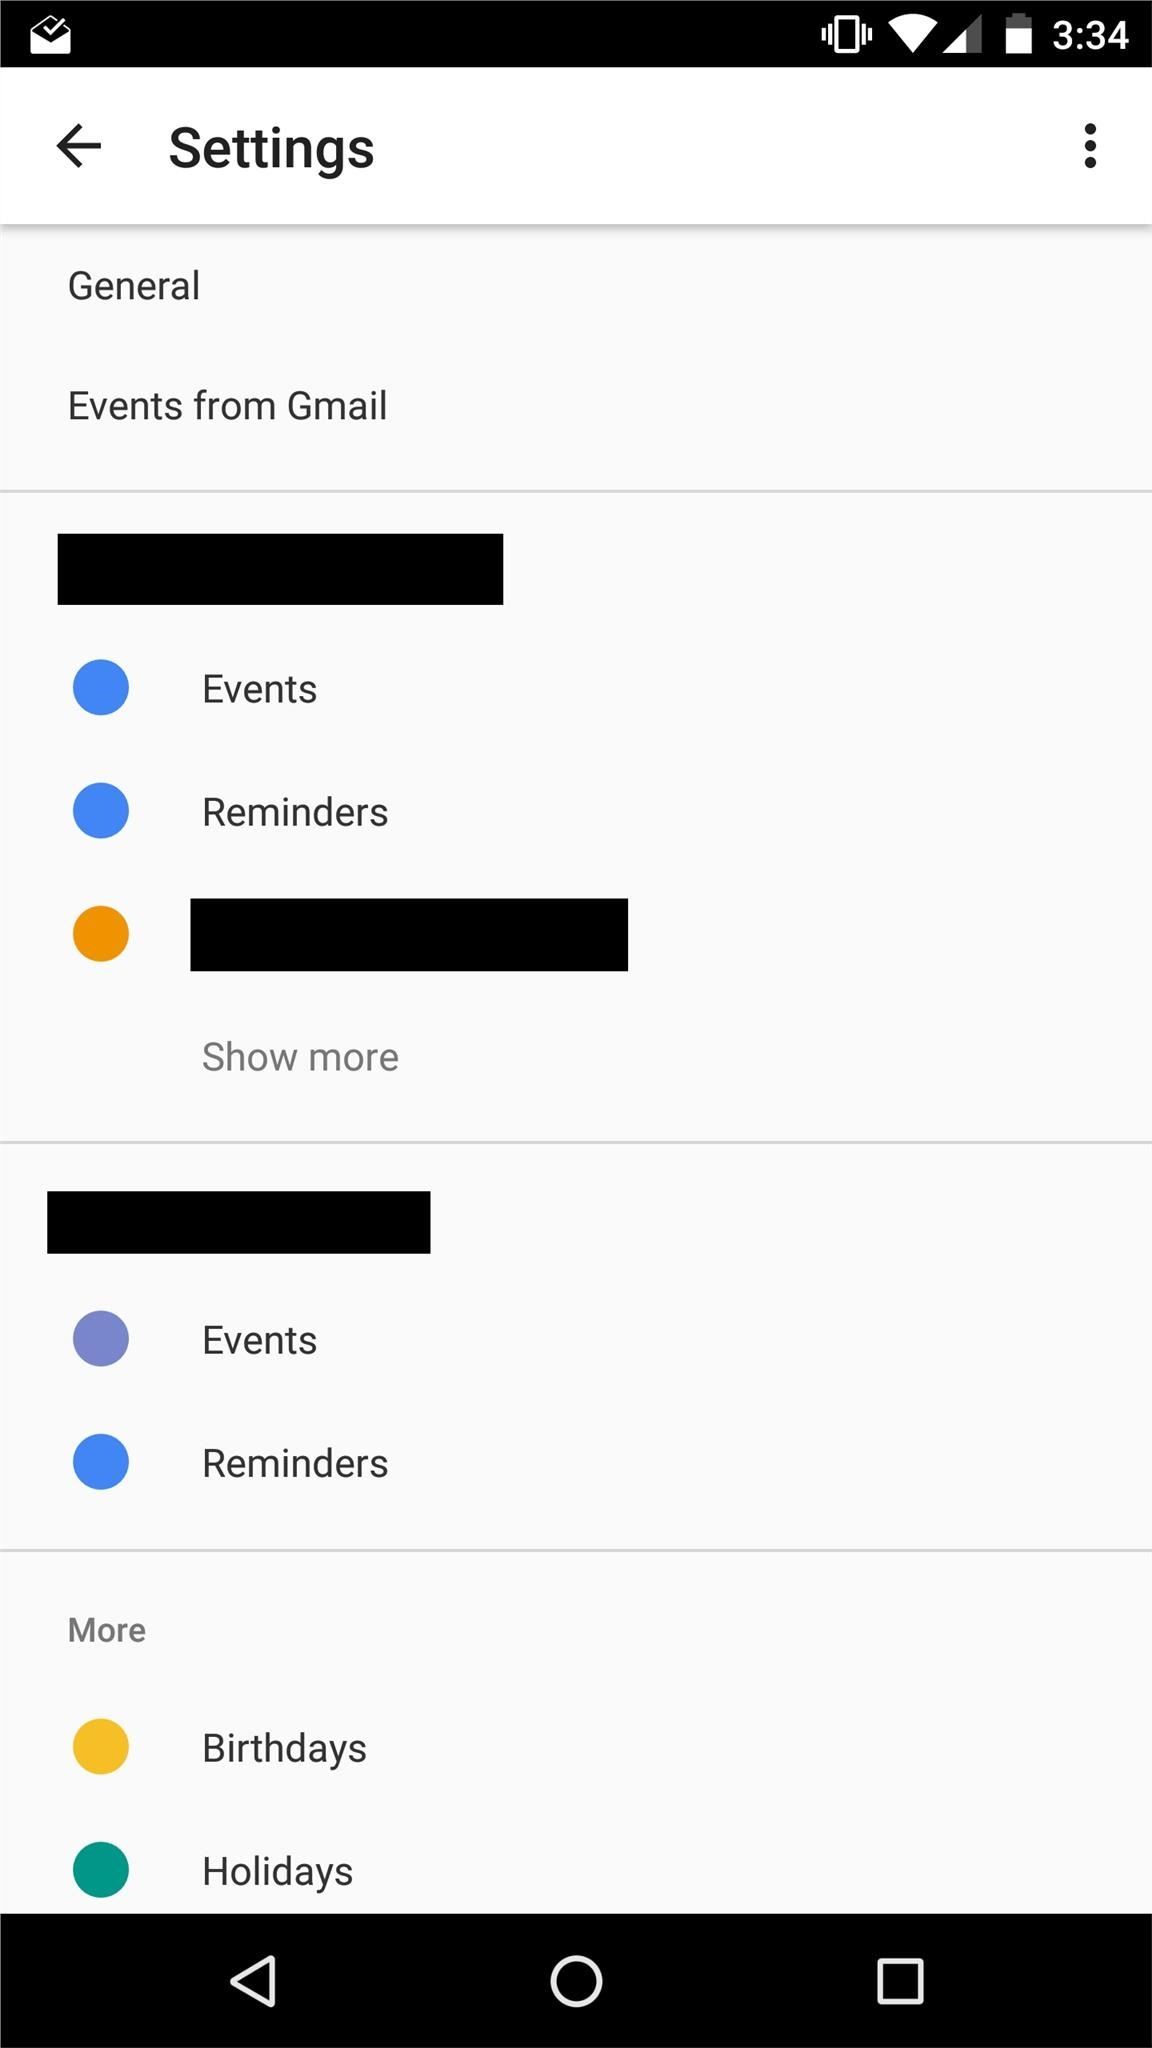
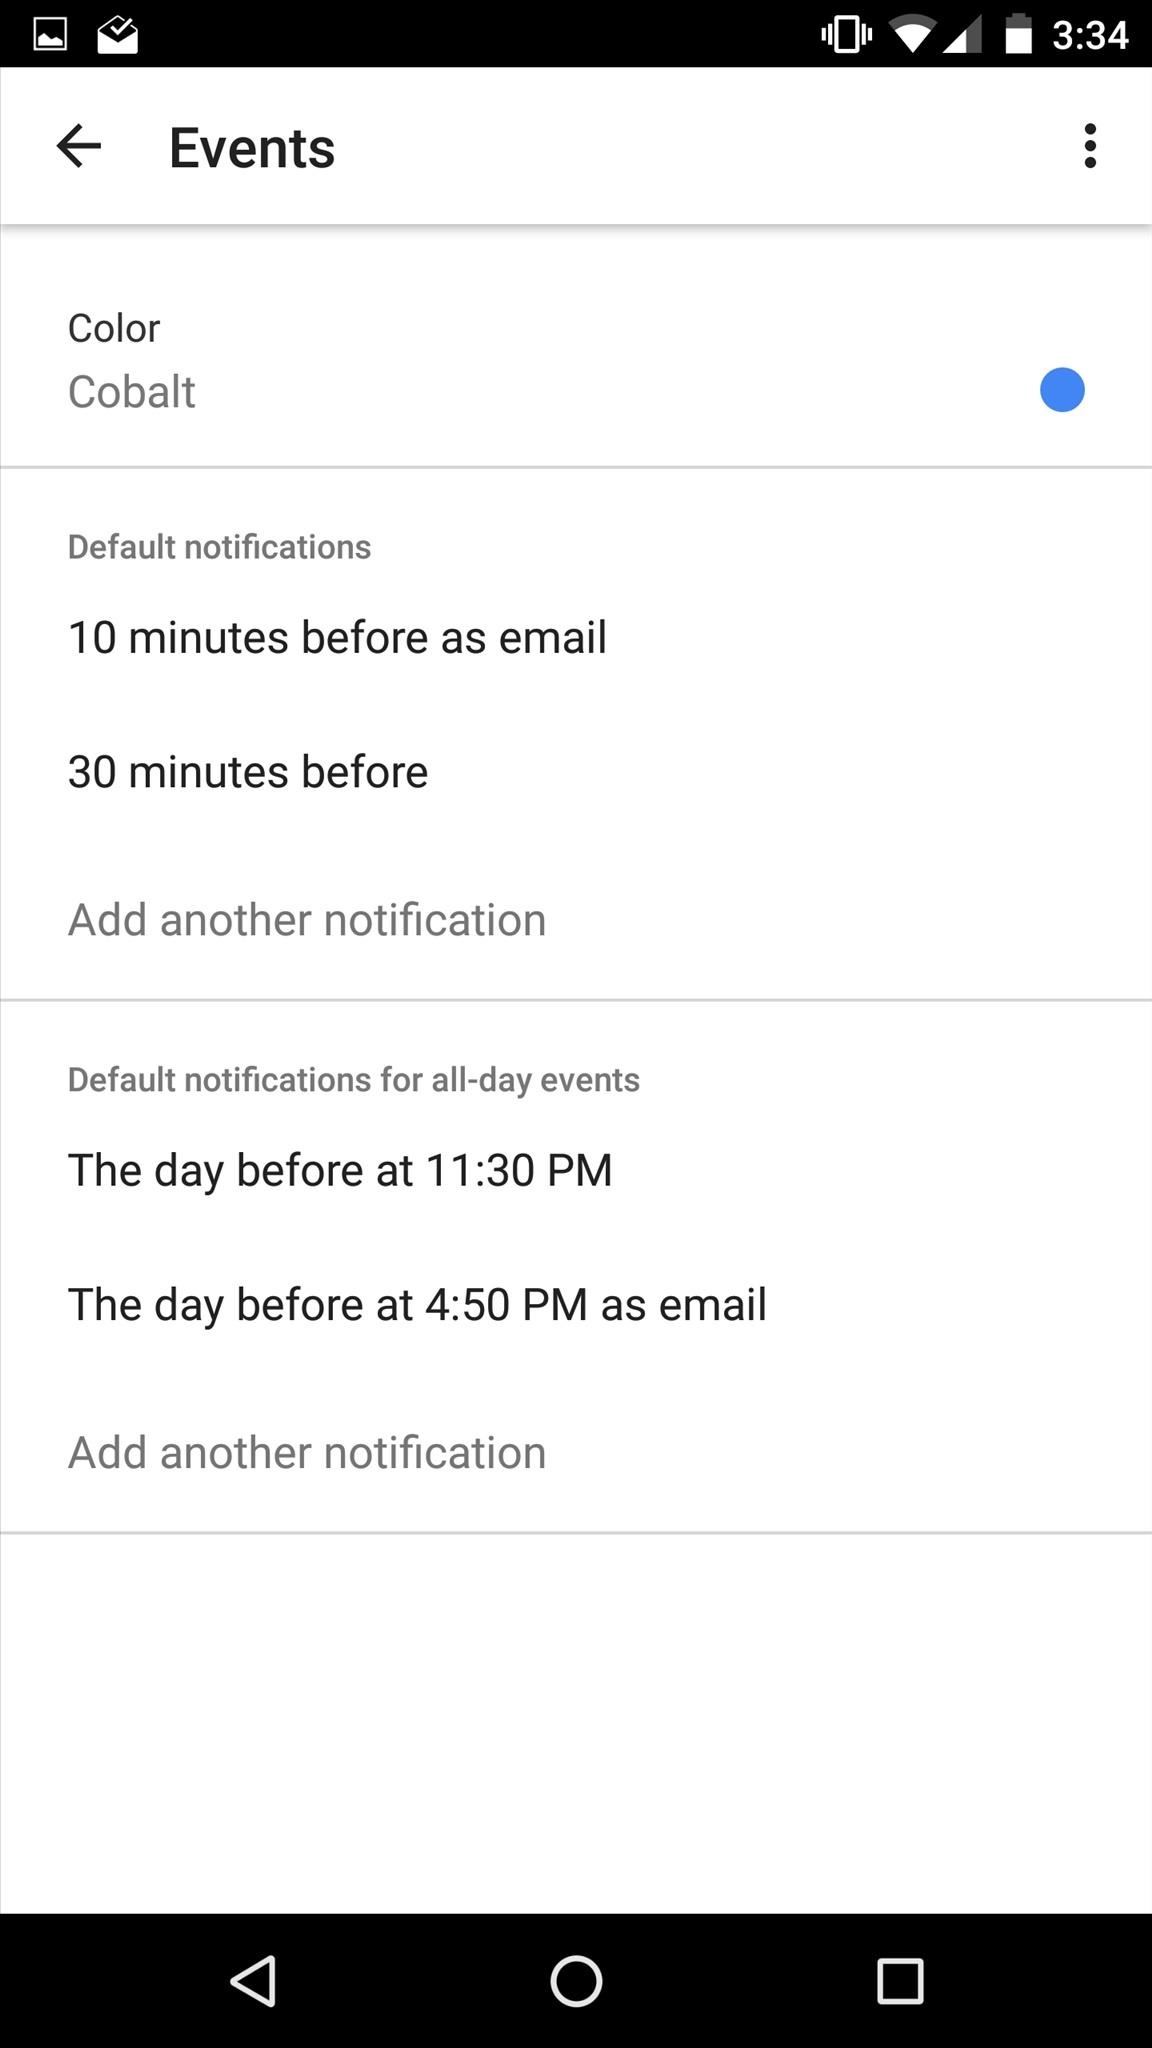
On mobile, access the settings by using the slide-in menu from the left, scroll all the way down to the bottom, and press "Settings." Once inside the settings section, you will see your calendars and their sections broken down for you. To change the color, simply select the one you wish to change and an option to change the color will be provided for you on the following screen.
To change your background image on the web client, you're going to need to select the Preferences cog, then go to "Settings" (or use your new keyboard shortcut). Once selected, identify where it says "Labs" towards the top and select it with your mouse.
Once selected, scroll down until you see the option named Background image. Select "Enable" and then "Save" your settings to return to your calendar.

Now, when you navigate to the "Settings," you will see the option to change your background image near the bottom of the list. Click "Choose image" to select a background picture for your calendar. (You may only see an option to Enter image URL, depending on your Google account.)

#8: Add Areas of Interest to Google Calendar (Web Client)
Besides being able to keep track of your own and personal events, Google Calendar can also keep track of many of your interests as well.
Do you happen to be a big sports fan? Google Calendar allows you to subscribe to different leagues and professional teams so that their schedule appears automatically on your calendar. Interested in the cycles of the moon? Google Calendar can provide that for you, too. What about holidays from different countries? Yep, it's possible. Curious about the time the sun will rise and set in your particular region? Google Calendar has it covered.
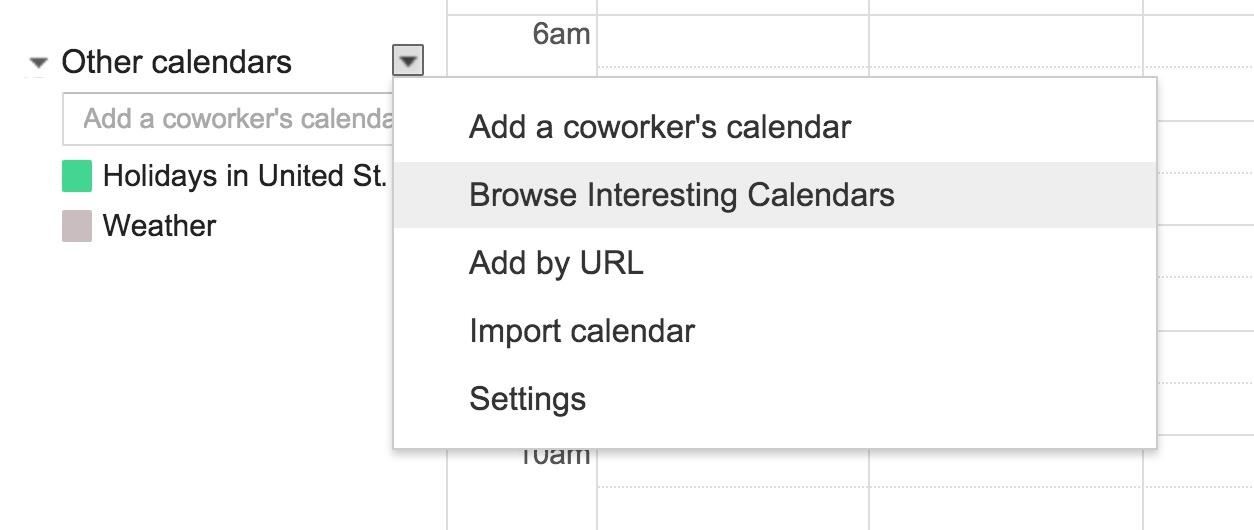
To add this sort of information to Google Calendar, navigate over to the left side of the screen to where it says Other calendars and click on the drop-down menu, then click "Browse Interesting Calendars."
From here, Google gives you the option to start adding different items to your calendar. To do so, simply click the Subscribe button on the right side of the screen to add the desired information to your calendar.
Note: Although you can't add these areas of interest on the mobile application, the areas you subscribe to will still show up on the mobile version of Google Calendar.
#9: Create Tasks Lists (Web Client)
Besides scheduling events, Google Calendar can also help you create a task list that exists separately from your calendar. This is a great tool to have to keep track of to-do lists and your reminders. Worried about forgetting materials for an important meeting? Simply create a task list and Google Calendar will help you remember what you need to bring.
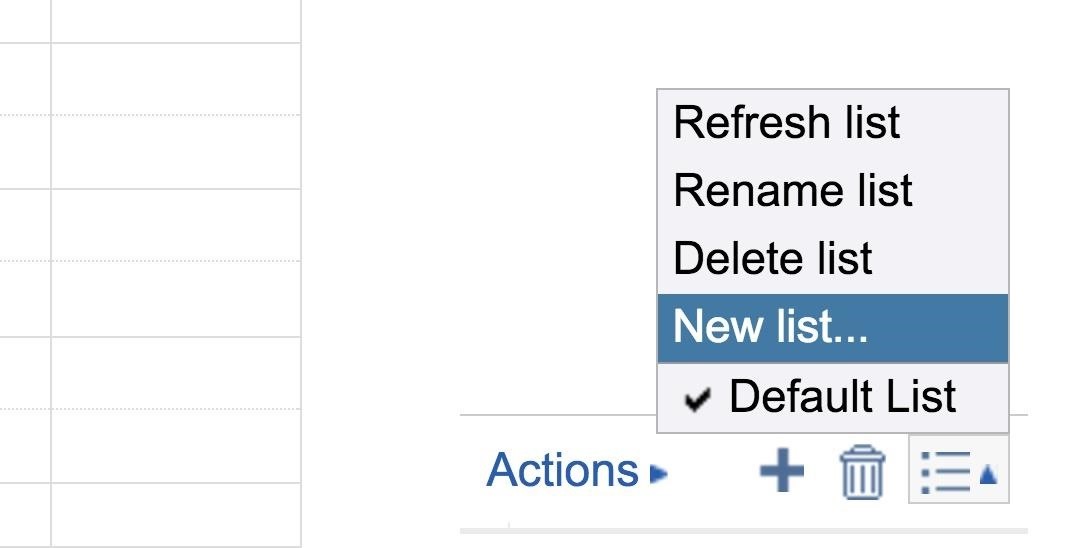
To create a task list, navigate to the lower right portion of your screen where the word Actions is displayed. To create a new list, move your cursor over the three vertical lines (the Switch list) and select it. (Note: you must have "Tasks" selected under My calendars first.)
From here, you will see some options but the one we're looking for is "New list"—select it and Google Calendar will prompt you to enter a new for your new list.
Once your list is created, you can begin adding items to it. You can create multiple lists for different purposes, and, to switch between lists, return to the three vertical lines, select it, and then select the list you wish to switch to.
Additionally, for each item on your list, you can add additional details to that particular item. To do so, find the particular item you wish to customize and move your cursor over to the arrow to the right of the item and select it. From there, you can change the due date, add a note, or even move the particular item over to another list.
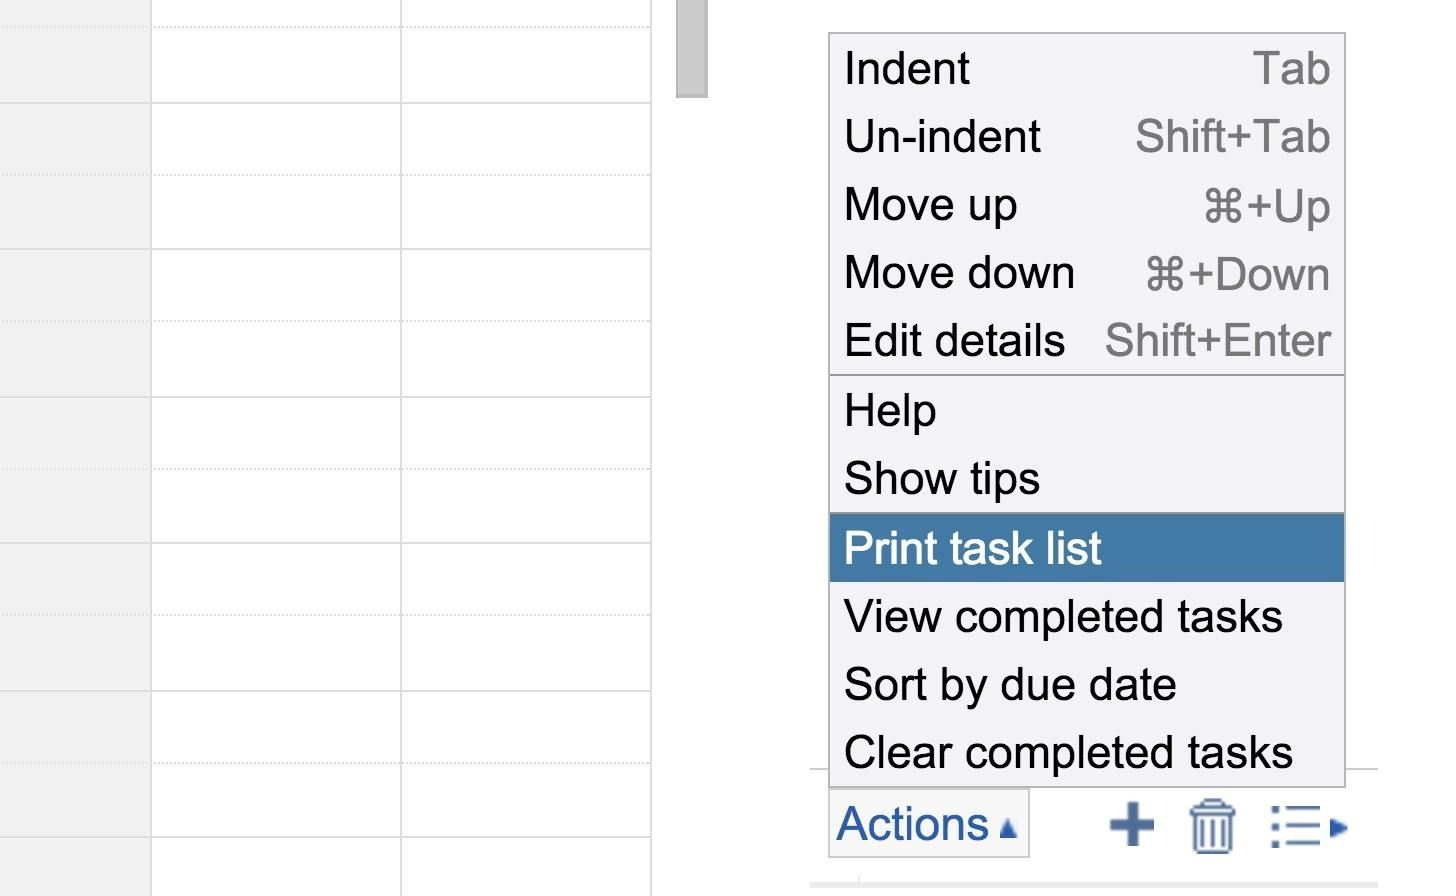
Google gives you more functionality by allowing you to sort your task lists by due date and also the option to print your lists if you prefer a hard copy. To do so, navigate again to "Actions" and select it. The option to sort and print will be located here for when you need them.
Note: Unfortunately, the Google Calendar mobile applications don't allow you to see your task lists.
#10: Send Daily Agenda to Your Email (Web Client)
If you'd prefer to have your daily agenda emailed to you each morning so that you can reference it throughout the day, Google Calendar can do this as well. Simply navigate to the left side of your screen where it says My calendars and select the drop-down menu located to the right of it. Once accessed, click "Settings."
This will take you directly to your calendar settings section. To enable the daily agenda email, simply identify the calendar you wish to receive emails for and then click "Edit notifications."
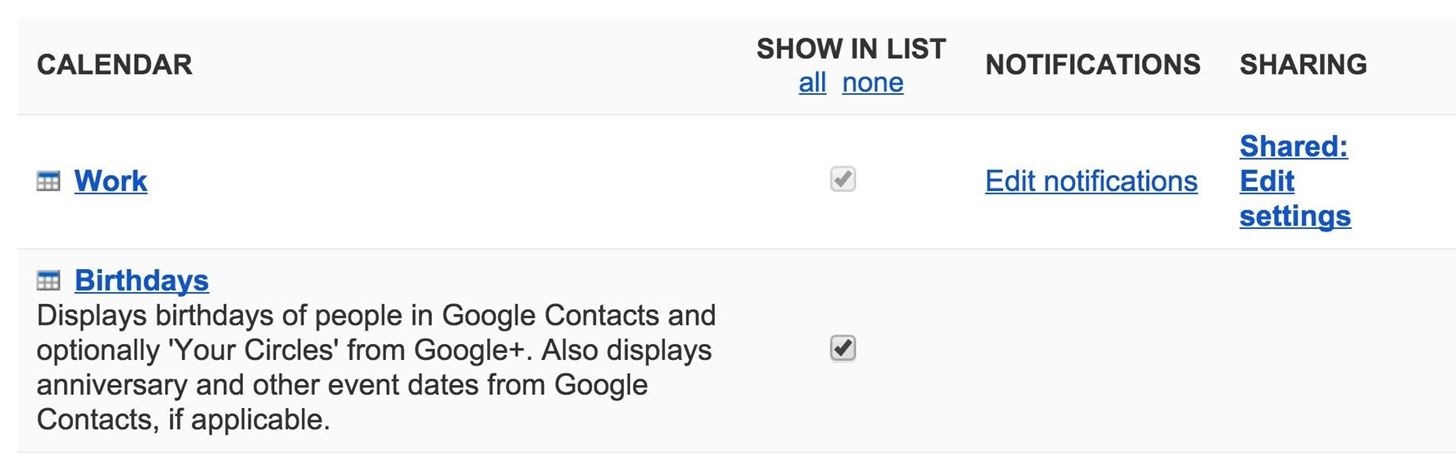
Once selected, navigate to the bottom of the screen and find there it says Daily agenda. Check the box to enable the daily agenda email.

#11: Create Quick Events (Web Client)
If you need to quickly add a new event to your calendar, for the current day or perhaps one further in the week, Google Calendar provides a quick solution to do so.
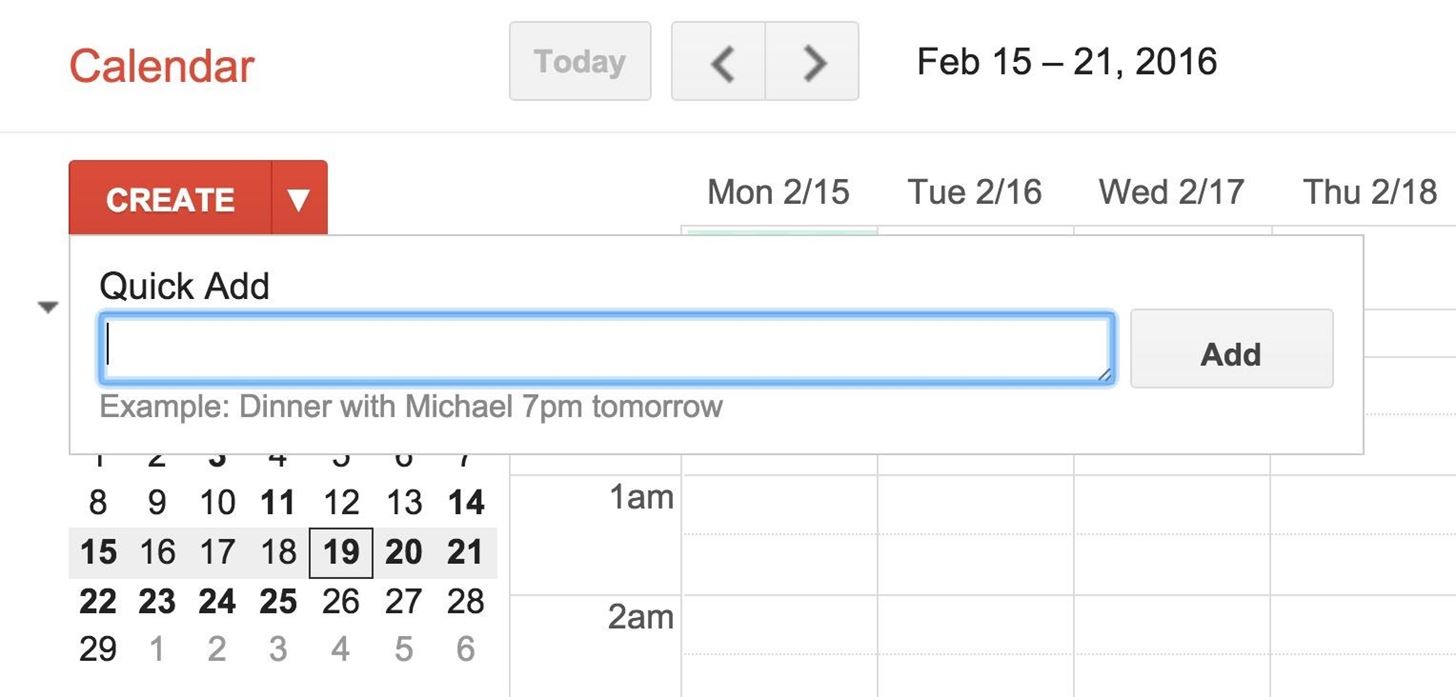
To add a quick event, navigate to the left side of the screen where the red button called Create is.
From here, you have two options: you can click "Create," which will take you into a more traditional event creation process, or you can click the drop-down menu to the right to add something quickly, as shown below.
#12: Add Google Hangout to Event (Web Client)
Google Hangouts is a powerful tool, useful in a variety of applications. From sending SMS messages, chatting with friends and family, and sending video calls, Google Hangouts is versatile to say the least.
Thanks to the synergy between Google products, you can now also set up a Google Hangout video call to any particular event on your calendar. When the event time comes around, a video conference will be created for all invited guests so that everyone can join in and begin conferencing.
To add a Hangout video conference to your event, simply select the event you wish to modify, click "Edit," then where it says Video call, click "Add video call."

#13: Attach Files to Your Event (Web Client & Mobile)
Attaching files to an event makes things easier for everyone invited, especially if the event is a meeting for a group project where everyone is expected to have certain materials on-hand.
To add an attachment, select the event you wish to modify, click "Edit event," then scroll down to where it says Description. The option to add an attachment will be under the description.

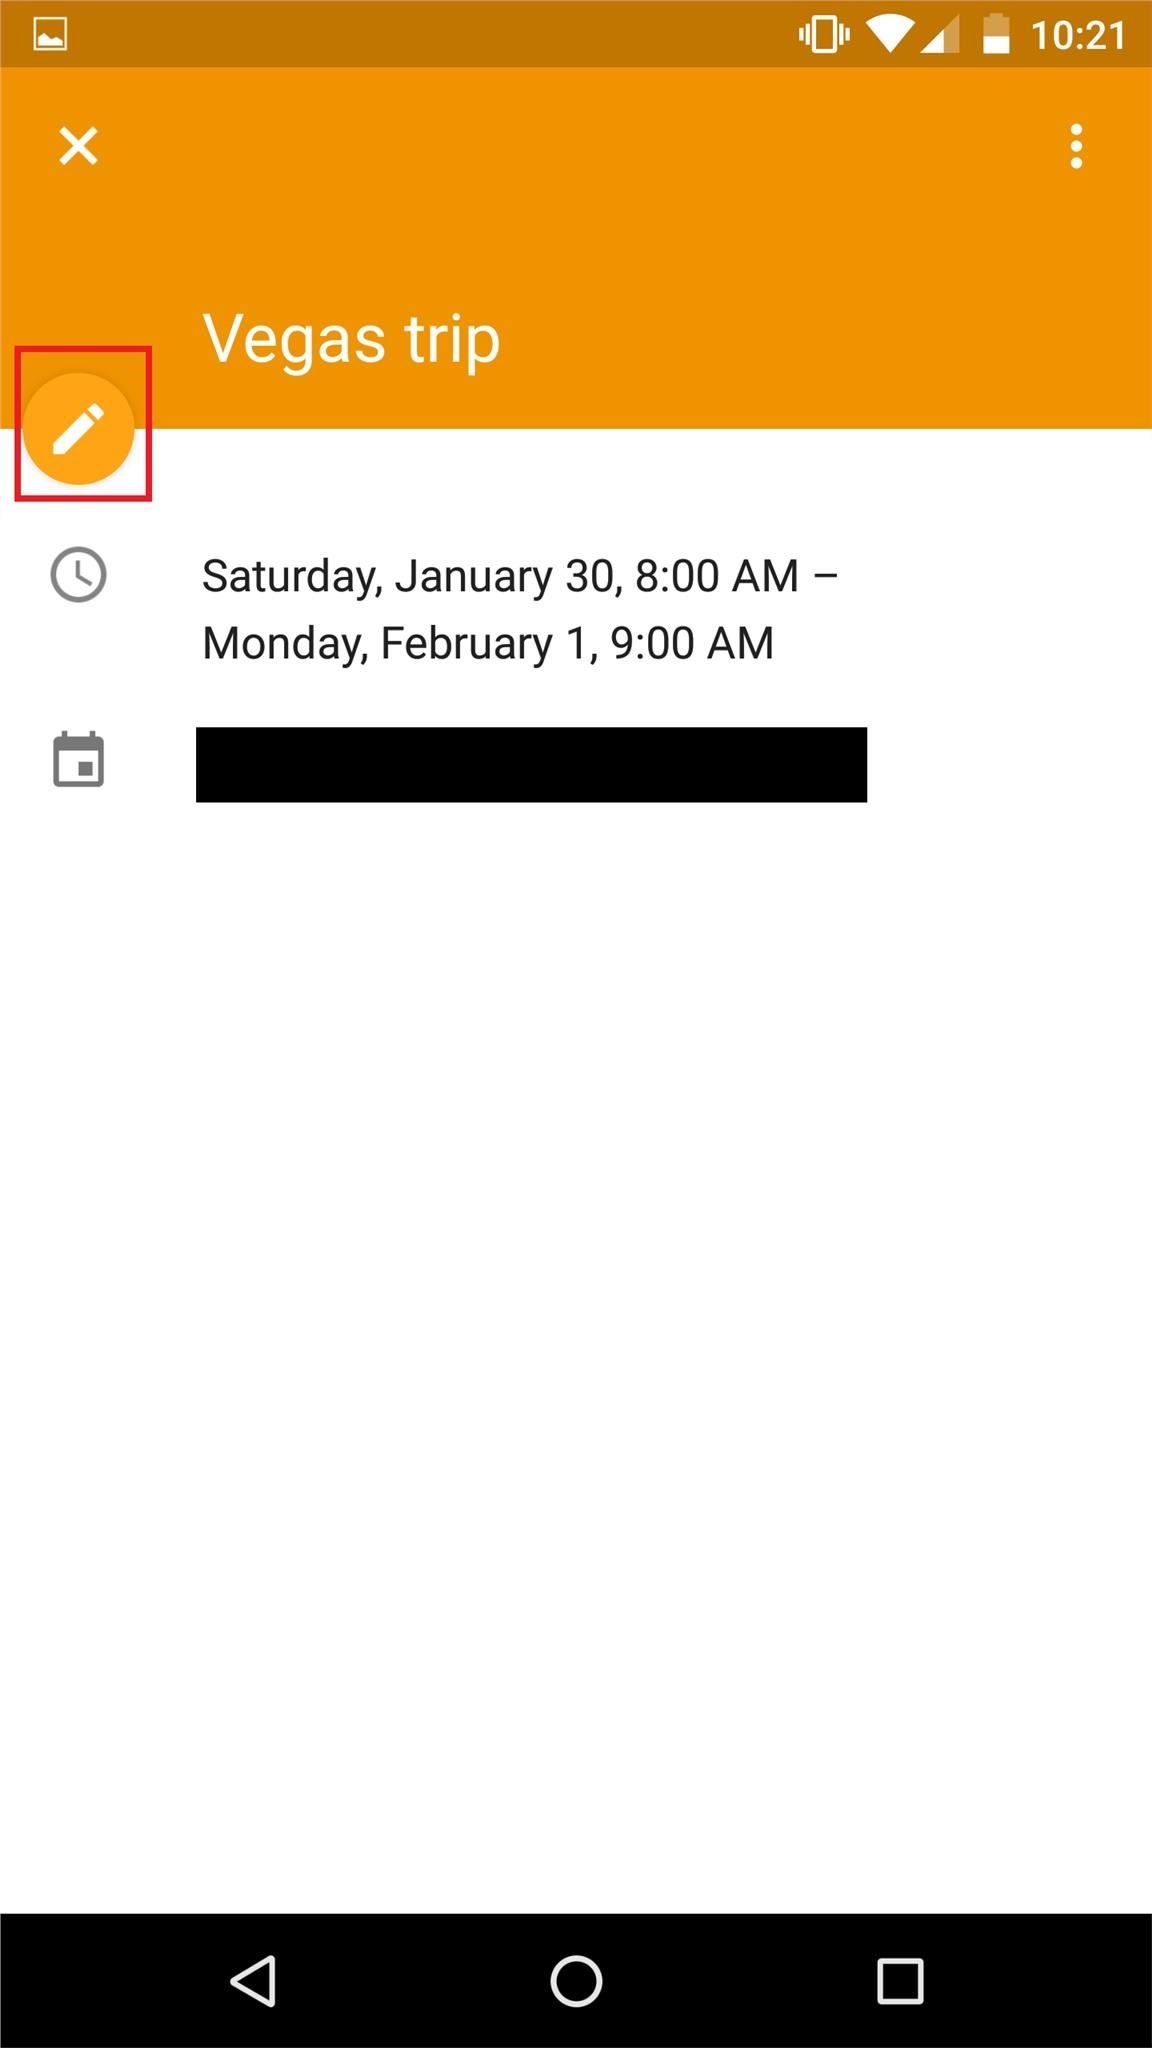
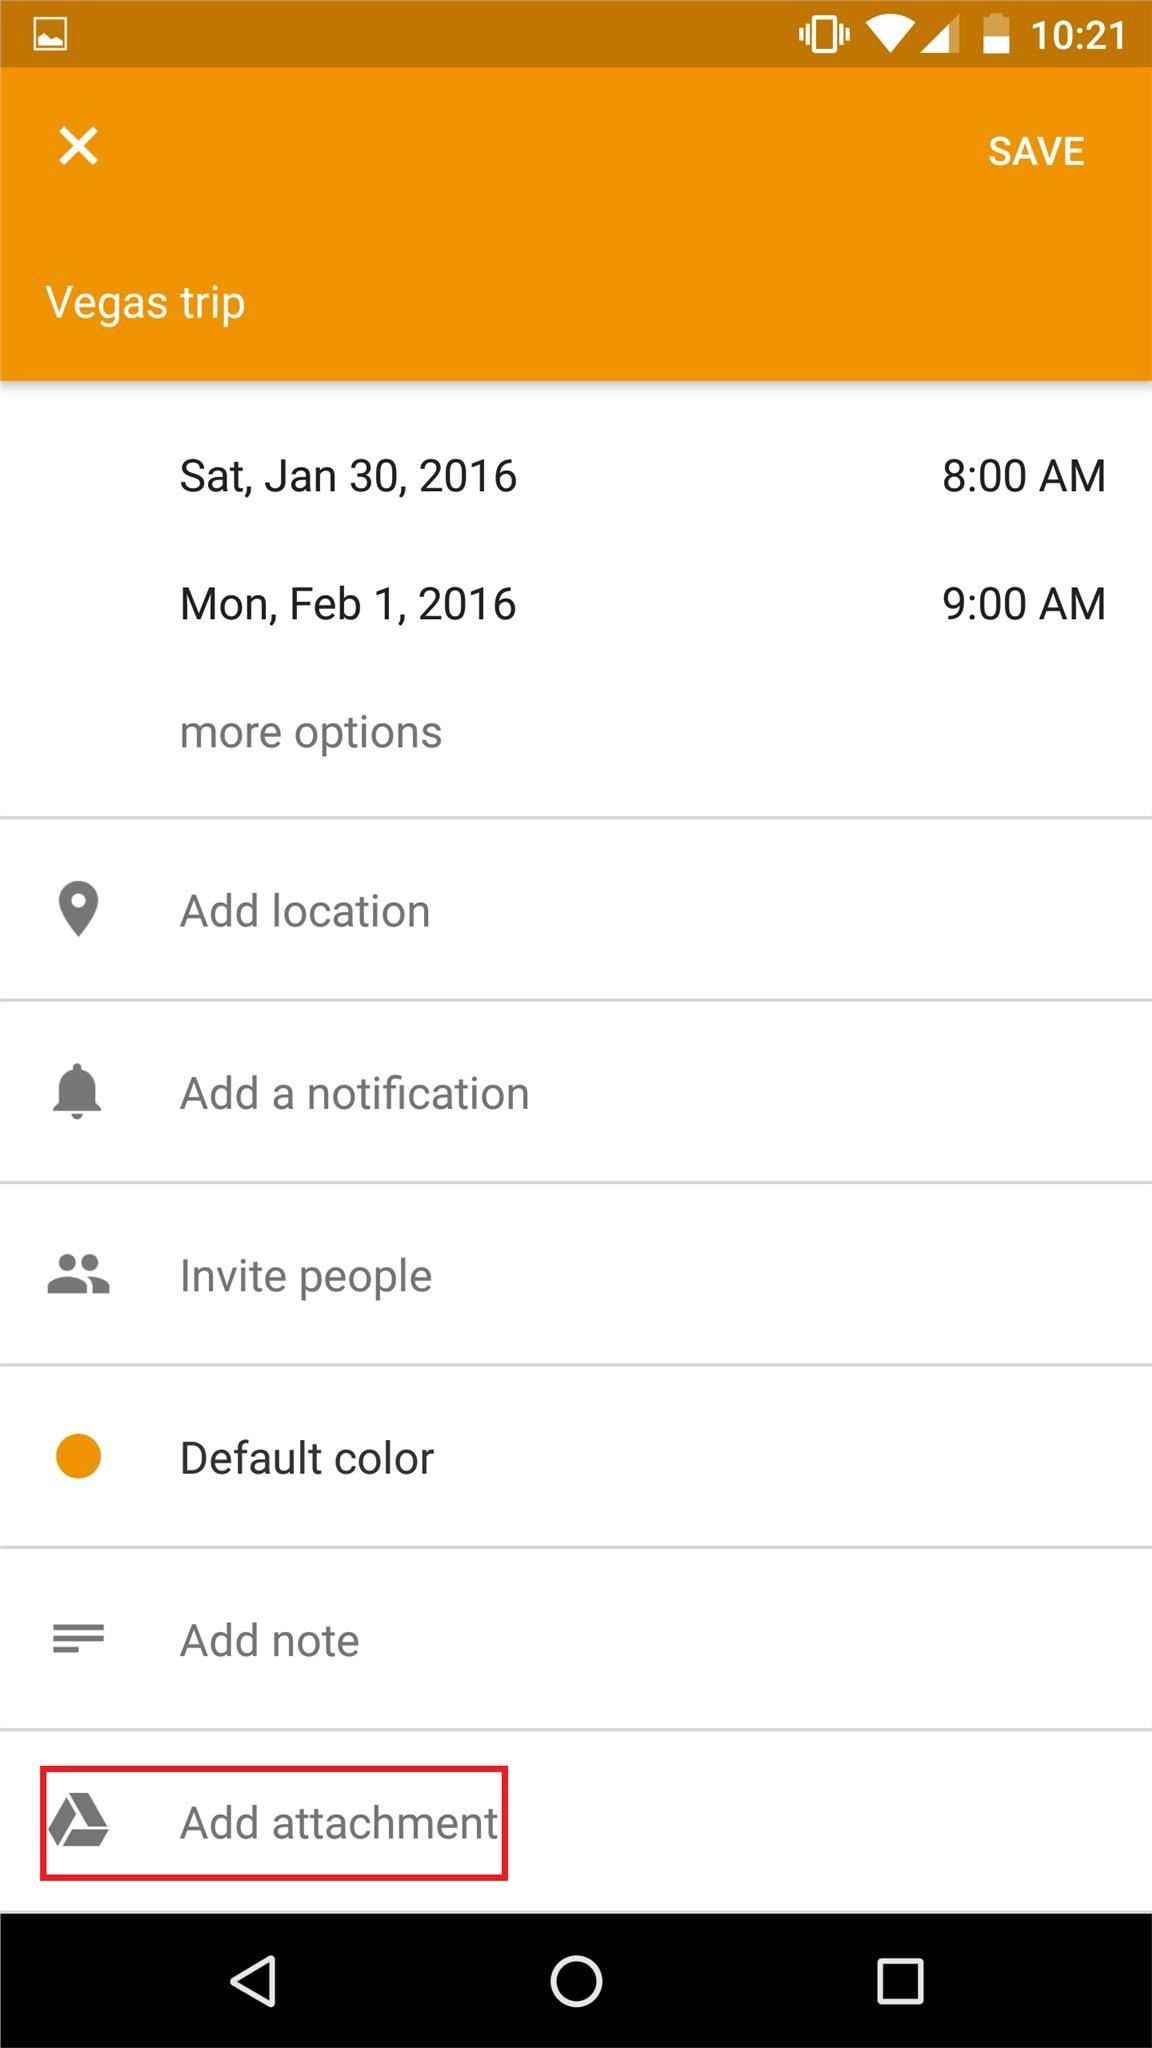
To add attachment on mobile, select the event you wish to modify, then select the pencil icon to edit the event. Scroll down to the bottom of the screen and select "Add attachment."
#14: Specify Location of an Event (Web Client & Mobile)
Specifying the location of an event is useful in situations where it may not be obvious to everyone invited as to where the event is to take place. For example, if the event is a study session for an upcoming midterm and your study group plans on using the library, it would be beneficial to specify which study room you wish for the group to meet in.
To specify a location of an event, click the event you wish to modify, click "Edit event," then find the area labeled Where. In that dialogue box, enter your location.
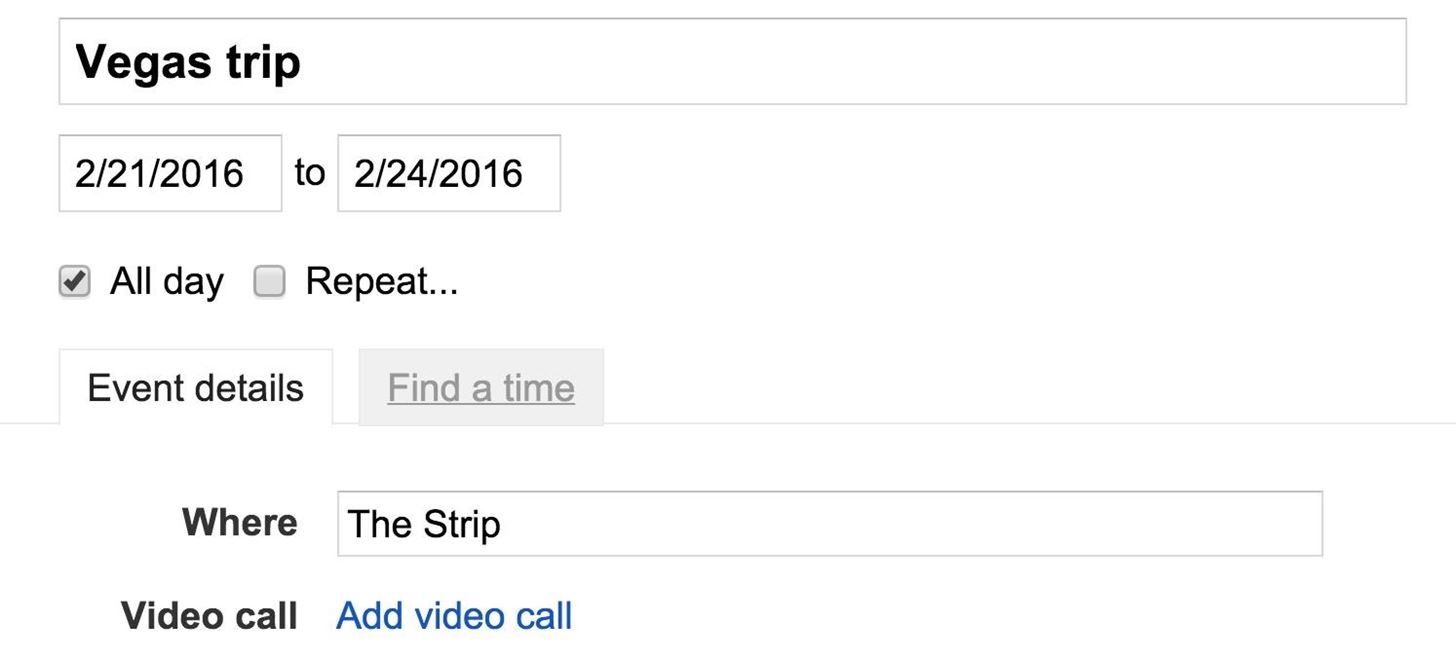
Additionally, you can enter the address of a specific location and Google Calendar will help fill in the dialogue box for you.
On mobile, simply access the slide-in menu on the left, select the event you wish to modify by pressing the edit button, then select "Add location."
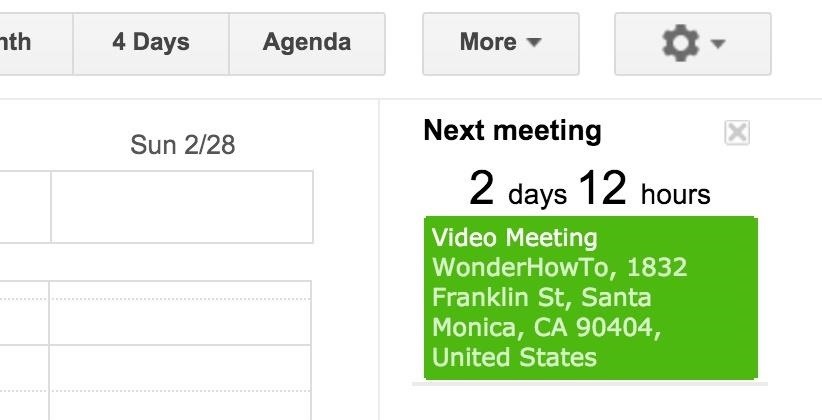
#15: Next Meeting Timer (Web Client)
If you're the kind of person who needs a more visual reminder of when you're next meeting is, Google Calendar has a solution for you.
To add a visual timer next to the area where your task lists are located, navigate to the Preferences cog, then click "Settings." Find where it says "Labs" at the top and select it, then scroll down until you see Next meeting and click "Enable."

After it's enabled, you will see a timer on your main Google Calendar page by your task lists.
We hope these 15 tips help supercharge your productivity in both your personal and professional life. If you have some tips that we missed, make sure to let us know.
Make sure to follow Gadget Hacks over on Facebook, Google+, and Twitter for more tips.
Just updated your iPhone? You'll find new emoji, enhanced security, podcast transcripts, Apple Cash virtual numbers, and other useful features. There are even new additions hidden within Safari. Find out what's new and changed on your iPhone with the iOS 17.4 update.


1 Comment
Learned more about using the calendar It's really helped me to schedule different items.
Share Your Thoughts